Showing posts with label cinnamon. Show all posts

Thursday, November 1, 2012

Halloween Baking: Apple Cider Poundcake

When I was little, I loved going trick-or-treating with my friends at Halloween. I remember one year in preschool I went as a Hershey Bar (and an adorable one at that, duh), and then as I got older I just watched scary movies and passed candy out to the neighborhood kids. Once I was in college, I didn't really do anything until they started the Haunted Hillsborough Hike my senior year. That year I was a magic 8 ball. It was an interactive costume and everything! And then another year I was Wilma Flintstone, which was probably one of my better costumes...until this year.

Now, when it comes to Halloween costumes, my best ideas have always been classic 90s characters (shocker, I know), but I've never really been able to/got around to following through with them. But when one of my best friends, Katie, and her husband decided to have a Halloween party, I knew I needed to finally make one of them happen (I won't reveal the other two because I'm saving those for future years).

BAM!
If you don't know who I am, then shame on you, because pretty much everyone figured it out without me telling them! It was awesome! I was super proud of it. The trench coat I got specifically because I wanted to wear it again, and the hat I bought from Target and spray painted it red (it was originally purple). Of course, the only fail was multiple people telling me they found me! I'm not a very good Carmen Sandiego in that regards, I guess. There were plenty of other fantastic costumes: the 10th Doctor, the TARDIS, a heavy metal rocker, Abe Lincoln Vampire Hunter, Richard Simmons, Batman, Rosie the Riveter, and plenty more. Overall it was a fun night!

But, on to the baking, which is why you read this thing, right? You mean you don't enjoy my silly random stories? Whatevs, I'll be telling them anyways :) 

So because the party was on Halloween, which was Wednesday this year, I wanted to bake, but bake something that was fairly simple because of my busy week. And since it's fall fall and everything fall (you know how much I love fall), an Apple Cider Pound cake seemed like the perfect choice. And let me tell you, this was one serious pound cake. 

After mixing together three cups flour, 1/2 tsp salt, and 1/2 tsp baking powder, I added in the spices: 1 tsp cinnamon, 1/2 tsp nutmeg, and 1/8 tsp ground cloves.


Now, it's Halloween time, and I swear I did not dump my spices in this way on purpose. It just kind of happened. I looked down into the bowl, and just started giggling to myself.
Baking ghost! Aaaaah!
After that fun little hilarity, I mixed three cups sugar with three (yes, three) softened sticks of butter (1.5 cups).

Once that was nice and fluffy, I added in SIX eggs. So. many. eggs. One at a time, mixing well after each one. Then it was time to prep the apple cider!! One of the brilliant things about this recipe was that I didn't have to go to the store and buy a single special ingredient. Why? Because I can make apple cider with my Keurig!!

It was also kind of hilarious putting my measuring cup under the Keurig while it brewed since I needed one cup (and I had to make sure it was the right amount!)


I mixed in 1 tsp vanilla into the cider, and then alternately poured the flour mixture and the apple cider into the sugar/butter/egg mixture until it was all combined. Then poured it into my greased bundt pan.

I baked the cake at 325 for probably about 85 minutes...I started out at 70, but because the batter was so thick, I kept adding on time to make sure it was fully done. 

And the end result?


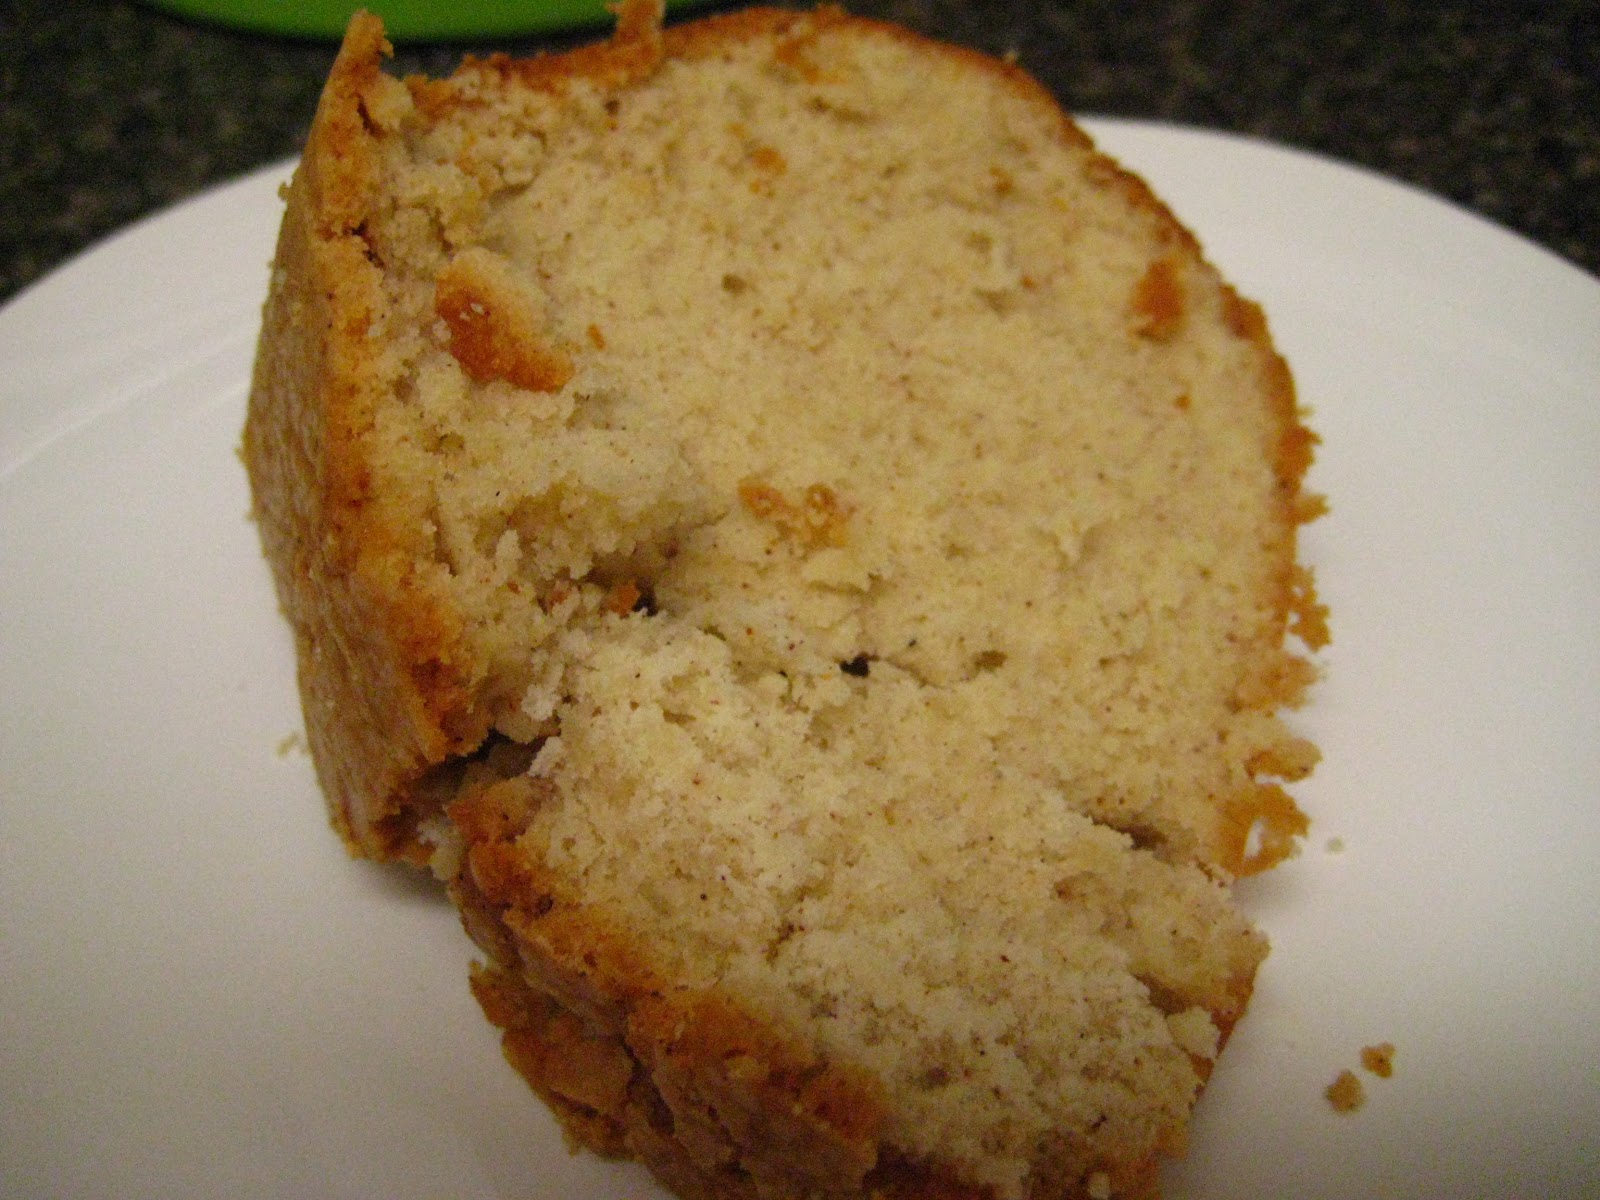
VERY DELICIOUS. The texture was perfect. You could just break off a piece cleanly (well, after you cut off a piece, you could break off a piece of that piece), you don't even really need a fork and plate because it held together so well. And it wasn't dried out at all, and just the right amount of spices. I'm definitely a big fan of this one, and will for sure make it again.

I LOVE FALL BAKING!!!

Monday, December 12, 2011

Christmas Baking: Apple Butter Banana Bread!

As most of my friends should have gotten their packages today (or will be tomorrow), I can share with you my Apple Butter Banana Bread and how you can use it as gifts! The recipe is super simple, and you could make the recipe as one large 9x5 loaf, or you can make it as three mini-loaves (3x5 pans). If you're making the one loaf, just add 10 minutes to the baking time.

For all the loaves I was making, I made five batches of the recipe, and after doing it twice, I didn't even have to keep looking at the recipe since I pretty much had it memorized at that point!

Start by combining 1.5 cups of flour, 1.5 teaspoons baking powder, half a teaspoon cinnamon, 1/4 teaspoon baking soda, 1/4 teaspoon salt, and 1/8 teaspoon nutmeg in a large bowl. Once it's mixed well together, make a well in the middle of the dry ingredients and set the bowl aside.

Then in a medium-sized bowl, mash two bananas until they're smooth, yet slightly lumpy.
Then you add two eggs (slightly beaten), 3/4 cup sugar, 1/4 cup canola oil, and 1/2 cup apple butter. I love WhiteHouse, but any kind you want to use will be good (if I had time, I would have gone to the farmers market because fresh homemade apple butter is amazing!).

After mixing all these ingredients together (without over mixing), then you pour the wet ingredients into the well of the dry ingredients.
Obviously it overflows past the well, but by doing the well, it makes it a little easier to mix together. I used a wooden spoon this whole time, there is no need to use a hand mixer or anything for this. You'll want to mix the wet ingredients with the dry just until everything is combined. You definitely don't want to over mix!

Then, after spraying my mini loaf pans with Baker's Joy (the best baking spray to make sure things don't stick!), I poured in the batter, about half to two-thirds full.
I baked the loaves for 35 minutes at 350 degrees. This was the perfect amount of baking time, but always check your loaves before taking them out by sticking a knife or toothpick in them and making sure it comes out clean.

After letting the loaves cool on an wire rack in the pans for 10 minutes, I popped them out of the pan and let them finish cooling all the way.
One tip I would give, is even though this recipe makes three mini loaves, if you have any intention of making more than one batch, have six pans. That way, as soon as you take one batch out, you can put another batch in, rather than waiting for the breads to cool and then reusing those pans. It'll save you a lot of unnecessary oven time!

I finished off the Christmas packages by wrapping each cooled loaf in clear plastic wrap, and then tied a Christmas-themed ribbon around the loaf!
It's nothing fancy, but I like the festivity of it!

I love my new tradition of sending my friends baked goods for Christmas (last year I sent different types of cookies) and mixing up what I send them!