With Easter comes a lot of leftover candy. One of my favorites? The Cadbury Creme Eggs. The originals. Not the caramel version. Not the mini version. The originals. I also love Cadbury because they don't feel the need to change their commercial to be all fancy. Who doesn't love other animals trying to pretend to be a bunny? NOBODY. That's who.

Then in your mixer, combine 3/4 cup light brown sugar, 3/4 cup sugar...

...with 1/2 a cup (or 1 stick) of melted butter (mmmm butter)...

...and 1 tablespoon vanilla. You'll mix this together for about three minutes on medium speed.

After everything is well combined, you'll add in two eggs, one a time. Make sure you use real eggs and not Cadbury eggs. It'll throw the whole recipe off. Mix those in for about 20 seconds after each addition.

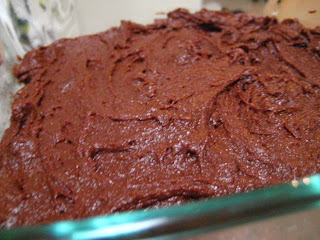
Then you'll slowly mix in the dry ingredients until everything is just moistened. And then, because there won't be enough sugar as it is, fold in 1/2 a cup of semi-sweet chocolate chips.

Then you'll spread the batter into a lightly greased 8x8 inch pan, and bake for 25 minutes at 350 degrees.
While those are baking, you'll want to cut your Cadbury eggs up! You can do however many you want, and I probably went a little overboard with it. The one nice things about the Cadbury's is that they have that nice seam down the middle, so they are super easy to cut.

When the 25 minutes are up, pull the pan out, push the egg halves into the brownies, and then bake for another 5 minutes so they set.

So what do you do when you have too much leftover candy and know that you'll either get sick from eating it all in one sitting, or let it sit on the counter for weeks until it's stale (there is never any normal in between with leftover candy...at least for me)? You use it for baking! It's been over a year since I discovered a recipe for brownies topped with Cadbury creme eggs, and I've been thinking about them ever since last Easter, so this year, I finally made them!
Start with 3/4 cup flour, 1/2 cup unsweetened cocoa powder, and 1/4 tsp salt. Whisk together in a bowl and set aside.

Then in your mixer, combine 3/4 cup light brown sugar, 3/4 cup sugar...

...with 1/2 a cup (or 1 stick) of melted butter (mmmm butter)...

...and 1 tablespoon vanilla. You'll mix this together for about three minutes on medium speed.

After everything is well combined, you'll add in two eggs, one a time. Make sure you use real eggs and not Cadbury eggs. It'll throw the whole recipe off. Mix those in for about 20 seconds after each addition.

Then you'll slowly mix in the dry ingredients until everything is just moistened. And then, because there won't be enough sugar as it is, fold in 1/2 a cup of semi-sweet chocolate chips.

Then you'll spread the batter into a lightly greased 8x8 inch pan, and bake for 25 minutes at 350 degrees.

While those are baking, you'll want to cut your Cadbury eggs up! You can do however many you want, and I probably went a little overboard with it. The one nice things about the Cadbury's is that they have that nice seam down the middle, so they are super easy to cut.

When the 25 minutes are up, pull the pan out, push the egg halves into the brownies, and then bake for another 5 minutes so they set.

LOOK AT ALL THAT SUGAR. I'm not entirely sure how I didn't gain 50 pounds just by staring at these. The brownies ended up being super fudgy and delicious, and you certainly don't need more than a small section to satisfy your sweet tooth craving. The Cadbury filling was really interesting after baking and then cooling because it solidified. It did make it easier to shove in my mouth though. It looked like my coworkers enjoyed them because I brought home an empty pan at the end of the day!


