Showing posts with label chocolate chips. Show all posts

Tuesday, June 5, 2012

Peppermint Patty Chocolate Chip Cookie Bars

I'm starting to think I have some sort of affinity for putting candy into already perfectly good desserts, as evidenced by my Cadbury Creme Egg BrowniesCandy Corn Chocolate Chip Cookies, and now...Peppermint Patty Chocolate Chip Cookie Bars!

Sometimes I get hit by this super urge to bake (but if we're being honest here, it's more like always), and that happened this past weekend, so I trolled my Pinterest baking board and picked these! I love chocolate chip cookie bars because they're a little more cakey than a typical cookie, and I love the cool flavors of peppermint patties, so this seemed like an ideal combo! I'm going to take the fact that the ones I brought to the office on Monday disappeared within about 3 hours as a sign that they were a hit! And I may or may not have found myself eating these for breakfast since I've been too lazy to go out and buy more milk after running out...I always like starting my days on a ridiculous sugar high, don't you?

There are a few different sizes you could make with this. You could do 8x8 if you want really thick bars, 9x9   for a tiny bit thicker (I found this fit the peppermint patties best, so it's the size I made), or if you're making them for a large crowd and want a thinner bar, go with 11x9 and double the amount of patties. Either way, you'll want to line the pan with aluminum foil generously sprayed with baking spray (I love Baker's Joy. It's a miracle in a spray can).

In a separate bowl, combine three cups flour with 1 teaspoon baking soda and 3/4 teaspoon salt.

In your mixer, you'll combine 2 sticks (1 cup) of room temperature butter with 3/4 cup granulated sugar and 3/4 cup brown sugar, until light and fluffy. I think my addiction to baking is evidenced by the fact that I love the smell of butter and sugar mixing together (and I would have used a different phrasing, except it sounded super dirty, and I'm trying to not be gross...but $5 if you can guess what I would have said!)

Once the butter and sugar is well combined, beat in 2 eggs and 1.5 teaspoons vanilla extract.

Then you'll veeeeeeeeeerry slowly add in the dry ingredients. The easiest way to do that is probably keeping the mixer on the lowest speed and pouring in the flour mixture a little bit at a time. You definitely don't want to add it in all at once because otherwise it'll be more difficult to get everything well combined and not have huge flour pockets at the bottom of the mixer bowl.

Then you'll add in a 12oz bag of chocolate chunks. I actually used the chunks, but you could also just get regular chocolate chips too if you want.

Once the batter is completed, you'll press half of it into the bottom of the pan, making a solid layer of cookie bar. Then you'll unwrap lots and lots of peppermint patties (I used a 12oz bag which had 24 patties) and place them to get maximum coverage.

Look at all those wrappers!

Then you'll take the rest of the batter and press it down on top of the patties to finish the patty sandwich. I thought this would be more difficult to get the batter to really spread out how I needed it too, but it proved to be very easy!

And then after baking at 350 degrees for about 35 minutes, I had some deeeeelicious bars!!!

There really is something about that shock of peppermint coolness, that even though you know it's there, it still kind of surprises you. And all that melted chocolate and cakey texture of the bars! Definitely another hit in my book. 
Tuesday, April 10, 2012

Cadbury Creme Egg Brownies

With Easter comes a lot of leftover candy. One of my favorites? The Cadbury Creme Eggs. The originals. Not the caramel version. Not the mini version. The originals. I also love Cadbury because they don't feel the need to change their commercial to be all fancy. Who doesn't love other animals trying to pretend to be a bunny? NOBODY. That's who.

So what do you do when you have too much leftover candy and know that you'll either get sick from eating it all in one sitting, or let it sit on the counter for weeks until it's stale (there is never any normal in between with leftover candy...at least for me)? You use it for baking! It's been over a year since I discovered a recipe for brownies topped with Cadbury creme eggs, and I've been thinking about them ever since last Easter, so this year, I finally made them! 

Start with 3/4 cup flour, 1/2 cup unsweetened cocoa powder, and 1/4 tsp salt. Whisk together in a bowl and set aside. 

Then in your mixer, combine 3/4 cup light brown sugar, 3/4 cup sugar...

...with 1/2 a cup (or 1 stick) of melted butter (mmmm butter)...

...and 1 tablespoon vanilla. You'll mix this together for about three minutes on medium speed.

After everything is well combined, you'll add in two eggs, one a time. Make sure you use real eggs and not Cadbury eggs. It'll throw the whole recipe off. Mix those in for about 20 seconds after each addition.

Then you'll slowly mix in the dry ingredients until everything is just moistened. And then, because there won't be enough sugar as it is, fold in 1/2 a cup of semi-sweet chocolate chips.

Then you'll spread the batter into a lightly greased 8x8 inch pan, and bake for 25 minutes at 350 degrees.

While those are baking, you'll want to cut your Cadbury eggs up! You can do however many you want, and I probably went a little overboard with it. The one nice things about the Cadbury's is that they have that nice seam down the middle, so they are super easy to cut.

When the 25 minutes are up, pull the pan out, push the egg halves into the brownies, and then bake for another 5 minutes so they set.

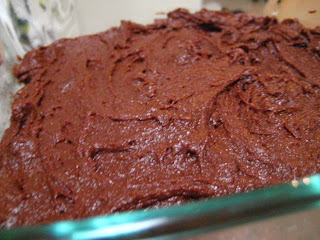
LOOK AT ALL THAT SUGAR. I'm not entirely sure how I didn't gain 50 pounds just by staring at these. The brownies ended up being super fudgy and delicious, and you certainly don't need more than a small section to satisfy your sweet tooth craving. The Cadbury filling was really interesting after baking and then cooling because it solidified. It did make it easier to shove in my mouth though. It looked like my coworkers enjoyed them because I brought home an empty pan at the end of the day!

Friday, November 18, 2011

Nutella Chocolate Chip Cookies

Yes. You read that heading correctly. NUTELLA CHOCOLATE CHIP COOKIES. My mouth waters at the words.

As much as I love baking with apple butter as a star ingredient (bars, pies, breads, etc.) I'm pretty sure that Nutella is THE best special ingredient you can use to bake. There is just something about that creamy chocolate hazelnut spread that smells/tastes/looks amazing. I never realized how much I could do when it came to baking with Nutella. I've made Nutella Swirl Pound Cake, Nutella mini-brownies, and now, Nutella chocolate chip cookies (and I've saved a handful of other Nutella recipes to try in the future).

I've been having a serious craving for some homemade chocolate chip cookies because they're so much better than the kind you buy in the store. So when I saw this recipe, I knew I had to try it, and as the smell from the oven wafts through my apartment, I'm pretty sure that was a great decision. It's a very simple recipe with few ingredients, and all ones that I had on hand.

You start with 2 cups flour, 1 tsp baking soda, and 1/2 tsp salt. Set it aside.

Cream 1 stick of room temperature butter (8tbsp), 1 cup sugar, and 1/2 cup brown sugar.

Once that is smooth and creamy, add two eggs and 1 1/2 tsp vanilla and mix until completely incorporated.

Then you mix in the flour mixture. I mixed about half of the mixture in first, and then once that's all incorporated, I mixed in the second half. This made sure that there were no flour pockets...or flour going all over my kitchen.

Now, in the past, when cookie dough was slightly dry, I just took it as it was and assumed that's how it was supposed to be. Obviously, I have consistently been wrong, so this time I decided to try something I had read online. I ended up mixing in a little less than 1/4 cup of water into the dough. This was perfect and got it to a nice consistency that I knew would spread how I wanted it to.

Then I added in a heaping 1/4 cup of Nutella, and mix it in for just a few seconds until there's Nutella streaks throughout the dough.

The final step is to add 1 1/2 cup chocolate chips. Mmm. More chocolate!

After putting the dough in heaping tablespoons onto the baking sheet and bake for about 10 minutes at 375 degrees.

And then you have yummy delicious sweet Nutella Chocolate Chip Cookies!

Wednesday, November 9, 2011

Candy Corn Chocolate Chip Cookies

Candy Corn is addictive. Once you start eating them, you can't stop. There's something in the ingredients that makes you just crave more candy corn. So even though it's a couple weeks past Halloween (the prime candy corn holiday), I found a recipe for candy corn chocolate chip cookies that was just begging for me to make it. It was a pretty extensive recipe that took two days and multiple steps. But the end result was....messy...but delicious!

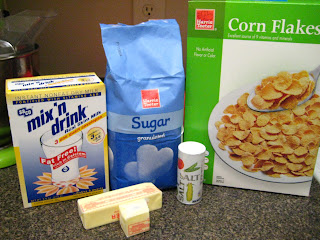
You start out by preparing the cornflake crunch. I know, cornflakes in cookies?? What insanity is this? The crunch is basically 4 cups cornflakes, 3 tbsp sugar, 1/2 cup dry milk powder, 1 tsp salt, and 10 tbsp melted butter all mixed together and then baked to sort of caramelize it.


One of the nice things about having metal measuring cups is that they also serve as good cornflake crushers.
Once the flakes are slightly crushed, add in the dry parts and mix well together.
I suggest using your hands to make sure everything is mixed well for coating. Using a spoon, the dry ingredients just sort of sit at the bottom of the bowl. After melting the butter, mix it in so that everything can coat.
Then spread out on a baking sheet, bake for 20 minutes at 275, and then let it cool for when you add it in to the cookies.
With such simple ingredients, you wouldn't think they'd create much of an aroma, but oh man, they created such a sweet smell. I don't know how to describe it, but it kind of reminded me a little of frosted flakes (one of the best cereals ever).

Now it's time to assemble the cookies!

First the dry ingredients: 1.5 cup flour, 1/2 tsp baking powder, 1/4 tsp baking soda, and 1 tsp salt. Mix them together and set it aside.

Once you have 1.5 sticks of butter (12 tbsp butter. Yea. 12.) softened, beat that with 1 1/4 cup sugar and 1/2 cup brown sugar.
Once it's light and fluffy, add in 1 egg and 1 tsp vanilla.
Then you add in the dry ingredients, and once those are mixed in, you add in the batch of cornflake crunch!

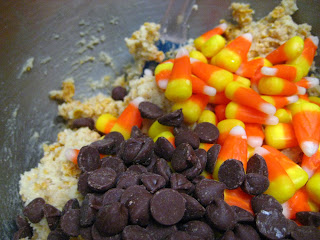
And then comes the candy corn. Ooooooh the candy corn. You only use a cup, but trust me, you only need a cup.

The recipe I was using suggested using mini chocolate chips, but I ended up going with half a cup of regular milk chocolate chips (to be honest, that was a bit of an accident. I grabbed the wrong bag and didn't realize it until I was pouring the chips into the measuring cup).


Once everything is mixed well together, you want to chill the dough for at least four hours. Now, there's a couple ways to do that, but in my opinion, the best way to do it was to scoop out the 1/4 cup sections of dough and wrap them individually so you wouldn't have to fight the dough later.

Lots of cookie dough balls...

Seeing as how it was about 10 at this point, I decided to finish the next day because I did not feel like getting up at 2am to bake cookies. I love to bake, but not that much.

So when I got home from work, I turned the oven to 375 and unwrapped the first batch of cookies. Now here is when things get....messy. The problem with the high heat is that it super destroyed the candy corn. After 15 minutes in the oven, the first batch turned out like this:
Yea. That's not pretty. They may look okay, but trust me, they weren't. I couldn't even get them off the pan that easily. There was no saving them to look like real cookies in the end.

So I decided to turn down the heat to about 325 and see if that prevented the candy corn from melting so much. I had to bake them a little longer, but it sort of helped. Not too much. The second batch at least had the cookie with the very visible candy corn piece. And I was able to get some of those off so that they still looked like cookies.


The third batch...still wasn't all that great...especially since I tried it without lining the cookie sheet. Big mistake. Trying to get those cookies off the sheet was a pain.

So in the end I had a big bowl full of cookie bits because it was almost impossible to have a total cookie survive.

But as my baking motto goes: It doesn't have to look pretty, it just has to taste good. And luckily...they tasted great. They were mega sweet so you can't eat more than like...a few sections of broken cookie, but they were fantastic all the same. Luckily I had friends to take home some, otherwise I would never finish eating them! I definitely like the idea of baking with candy corn, but I need to figure out how to keep them from melting to crystallized sugar!