Showing posts with label chocolate. Show all posts

Tuesday, December 11, 2012

Christmas Baking: A Smorgasbord of Goodies!

Sometimes when I'm up baking really late at night, and I start talking to myself about what I'm doing (I'm not crazy, I promise), I worry that if someone else was around, this is what they would see:

Oh Swedish Chef. You make me giggle.

Moving on! So for the third year in a row, I completed my crazy Christmas baking extravaganza to send treats to my friends across the country for the holidays. I'm incredibly grateful for the wonderful friends I have in my life, so it's a little way I can show them how much I love and appreciate them. Plus, it's a great excuse to try new recipes. The first year I did it, I did tons of cookies, last year it was bread, and this year it is a variety of treats! I also decided to get very crafty with the presentation of everything.

My apartment basically looked like a baking factory for a couple weeks with my supplies strewn everywhere. I had cards spread out over my couch as I wrote ones for everyone to include in the packages. And then I had to tape up the boxes and set them up for easy packing. This year, I had what I feel is more than normal, but I can't remember. It ended up being 34 people in 21 households (and that's with me forcing myself to limit my list a little this year). The boxes made it a little difficult to walk around for a few days, but all in the name of organization!


Unfortunately, I did a terrible job of taking pictures as I baked this time around, mostly because I was too distracted with trying to finish everything!

So to start, here's the final product! Pumpkin bread in a jar, chocolate fudge in a cookie cutter, and eggnog cookies!

So the Pumpkin bread was by far the funniest baking adventure I've had in awhile. I had never baked anything in a jar before, but I thought it was a clever and cute idea. I ended up buying 12 oz jars, and then I bought fabric and ribbon to dress up the jar a little. I doubled the recipe and then did two batches of that, which made 23 jars of bread. Baking them in the oven was hilarious because it's all a balancing act. You don't want to bake the bread on a baking sheet because it doesn't cook through like it's supposed to, so you need to put them directly on the rack.


When it got close to be doing, I wanted to test a jar to see if it was done or not. Bad idea. I kept knocking jars over in the oven and then struggled to get them balanced on the rack again. I ended up having my head practically in the oven for at least 10 minutes trying to fix it all. But they eventually turned out great! As soon as I took the jars out of the oven, I immediately put the lids on the jars, and as the breads cooled, it sealed the jars. The first time a seal popped, I jumped a little because I forgot it was going to do that. The only problem I ended up having was the shape of the jars made it difficult to really grease them, so everyone will have to make sure they eat the bread from the jar...unless they like big crumb messes.


The rest of my baking was done between 11pm and 3:30am on the Friday night before I mailed everything out. On four hours of sleep. After working a 15 hour day (including 8.5 hours of driving to and from Charleston). But you know what is totally ridiculous? As soon as I started baking, I was just in the zone, very relaxed, and felt like i was moving pretty fluidly. That's why, even when I bake really late like that sometimes, I don't care because it's not stressing me out. Until I see the dirty dishes and then I save them until after I've slept. Ha. 

When I made the cookies, I doubled the recipe, and with making them a small size (about a tablespoon scoop per cookie), I made almost 100 cookies! SO MANY COOKIES. But it meant each person got three cookies each, so it was perfect. I didn't do the glaze on them though because most of them were getting mailed and it was just easier. The thing I loved about the cookies was the eggnog flavor did not hit instantly, and when it did, it was the perfect amount. I then put each person's cookies in little ziplock baggies with snowmen on them! Very festive.

The chocolate fudge was last and I molded each person's fudge in a holiday cookie cutter! I used a random fudge recipe with semi-sweet chocolate chips and marshmallows, and it was soooo rich and delicious. I wrapped each cookie cutter bottom in foil and greased them so as I poured the fudge in, it wouldn't seep out and it would stay in the cookie cutter. After making each batch, I poured the fudge in to the cookie cutters, and used a spoon to spread them to the edges. I had snowflakes, snowmen, christmas trees, sleighs, elves, wreaths, and many other shapes! I then stuck them in the fridge so they could set. It was very labor intensive, but really fun to make. 

I'm glad I finished up all my baking in time to mail everything out, and I hope my friends really enjoy their treats!

Tuesday, October 2, 2012

S'Mores Bars!

So much for me being an on-time blogger. This is what happens when you're a busy girl! But I am finally blogging about one of my favorite baking treats! S'more's Bars!
I don't think it's any sort of secret how obsessed I am with s'mores...which is slightly odd considering I can't tell you the last time I had a real s'more. But I love all things s'more (well, almost...the s'more Luna bars are not good). I've made a killer s'mores pie before, I reeeeeally want to make some s'more's cupcakes at some point, and I keep pinning other s'mores type recipes. And of course, the deliciousness of s'mores bars. I think my favorite part of making these was my niece and nephew's reactions to them. Henderson was super excited about eating them after just seeing a picture, and Bellamy, after finishing her piece, kept asking for more. Just another reason I love to bake.

You'll want to pre-heat the oven to 350 degrees, and set out a 1/2 cup of butter (1 stick) so it can come to room temperature. Then you'll want to crush 6 graham crackers. This part is fun. I always love using my heavy duty rolling pin. It's a good way to get out any aggression too. 


Mix together 1 and 1/3 cup flour, 1 tsp baking powder, 1/4 tsp of salt, and the graham cracker crumbs.

In your mixer, combine your room temperature butter, 1/2 cup sugar, and 1/4 cup brown sugar.

Then you'll add in one egg and one teaspoon vanilla.

Mix in the dry ingredients and you have your crust!

You'll want to press half the crust into your 8x8 pan, and then you'll layer your two king sized chocolate bars (I used dark chocolate because let's face it, it's WAY better than any other type) and one 7oz jar of marshmallow fluff (which made me start craving fluffernutter sandwiches).


Then you'll create a top layer with the rest of the crust mixture. I found the easiest way to do this was take sections, flatten them in my hand, and then just kind of place them around the top.

After baking for 30 minutes, you have this AMAZINGNESS. OMG. Even my apartment smelled of s'mores. It's heaven. I wanted to bottle that smell up for later, but I guess I'll just have to make them all the time instead.

Sunday, May 13, 2012

Neapolitan Zebra Bundt Cake

I'm not sure if I've said this before, but I'll say it again. I looooooooove strawberry and chocolate together. Love. So anything Neapolitan is amazing to me. My favorite cake from my favorite bakery is the Neapolitan cake. If I buy a carton of ice cream, I typically gravitate towards the Neapolitan. I just love it all. Got that? Okay. I'll stop talking about my adoration for it now. 

Because of this love, after seeing this on Pinterest, I just knew I had to make it. Plus, it looked really really cool. I'm really into the idea of cutting into something and having it look completely different from what you would expect just looking at the outside. 

You start with a looooooot of butter. Five sticks, or 2.5 cups or 40 tablespoons, however you want to look at it. In the original recipe, she uses cottage cheese, but I didn't want to do that, so I substituted in the butter. Because deep down I'm like Paula Deen and think that the more butter the better.


You melt down the butter, and then let it cool. So. Much. Butter.

In your mixer, you'll pour three cups of sugar, and then add in the cooled butter, and mix on medium-low speed for three minutes.

Once that has come together, you add in one tablespoon vanilla and one teaspoon salt, and mix well.

To go along with the lots of butter. You then have lots of eggs! Add six eggs, one at a time, and make sure you mix thoroughly (about 20 seconds) after each addition. Because of the way the batter was, it took a few spins for the yolk eventually to break up. Maybe that is something that just happened to me, but it made me laugh watching the yolk spin around on top of the batter (hey, we bakers have a strange sense of humor, okay?)

With the mixer on low speed, add in three cups of flour, one at a time.

Once the base batter is done, you'll want to divide it evenly into three bowls so you can make your layers! To make the strawberry layer, you pour 1/4 cup of strawberry Jell-o mix into the batter and then mix together. Totally weird, right? I never would have thought to add strawberry jello mix to get that flavor (since I've never made a strawberry flavored cake other than boxed), but apparently that is what you do! I'm glad to have learned that because now I might make strawberry cupcakes with chocolate frosting one day.

I also didn't use the mixer to add in the strawberry and chocolate (which, it's 1/3 cup of cocoa powder to create the chocolate layer). Instead I used my awesome arm muscles to stir like a mad woman to make sure it was mixed well together. 

Now, creating the zebra affect was a little complicated. Because I couldn't quite understand exactly how the original baker did it (maybe my brain isn't working), so I just kind of made it up as I went.


And then I baked it for about 65 minutes at 350 degrees. And then cooled for about 5 minutes in the pan and then let it cool all the way.

You're technically supposed to make a glaze. Which I'll be honest, I attempted. But it was a fail. But I think it'll be fine without it.

My friend Megan came over for a trashy tv night, so we had a slice of cake, some vanilla ice cream, and a glass of Biltmore Chenin Blanc wine to go along with our Sister Wives and Tough Love viewings!

Overall, the cake was very tasty. It was a bit gooey (but not under-cooked)...I don't know if that's because of the insane amount of butter, or because of the jello. But what can you do? Especially since I baked it a long time, and any longer it would have burnt. And the "zebra" look didn't really look....zebra. It looked more layered, but I was kind of expecting that. Maybe other slices will have more of that look to it. We will see. Either way, I liked it and the mixture of flavors was really delicious!

Also, on a side note, this happened today:

Just to warn you, don't drop your phone on the concrete. It may sound like a good idea, but it isn't. I really wish my warranty covered clumsiness. I might just tell people I was shot at, and the bullet hit my phone since that main part at the top looks like it was hit with a bullet. 

Tuesday, April 10, 2012

Cadbury Creme Egg Brownies

With Easter comes a lot of leftover candy. One of my favorites? The Cadbury Creme Eggs. The originals. Not the caramel version. Not the mini version. The originals. I also love Cadbury because they don't feel the need to change their commercial to be all fancy. Who doesn't love other animals trying to pretend to be a bunny? NOBODY. That's who.

So what do you do when you have too much leftover candy and know that you'll either get sick from eating it all in one sitting, or let it sit on the counter for weeks until it's stale (there is never any normal in between with leftover candy...at least for me)? You use it for baking! It's been over a year since I discovered a recipe for brownies topped with Cadbury creme eggs, and I've been thinking about them ever since last Easter, so this year, I finally made them! 

Start with 3/4 cup flour, 1/2 cup unsweetened cocoa powder, and 1/4 tsp salt. Whisk together in a bowl and set aside. 

Then in your mixer, combine 3/4 cup light brown sugar, 3/4 cup sugar...

...with 1/2 a cup (or 1 stick) of melted butter (mmmm butter)...

...and 1 tablespoon vanilla. You'll mix this together for about three minutes on medium speed.

After everything is well combined, you'll add in two eggs, one a time. Make sure you use real eggs and not Cadbury eggs. It'll throw the whole recipe off. Mix those in for about 20 seconds after each addition.

Then you'll slowly mix in the dry ingredients until everything is just moistened. And then, because there won't be enough sugar as it is, fold in 1/2 a cup of semi-sweet chocolate chips.

Then you'll spread the batter into a lightly greased 8x8 inch pan, and bake for 25 minutes at 350 degrees.

While those are baking, you'll want to cut your Cadbury eggs up! You can do however many you want, and I probably went a little overboard with it. The one nice things about the Cadbury's is that they have that nice seam down the middle, so they are super easy to cut.

When the 25 minutes are up, pull the pan out, push the egg halves into the brownies, and then bake for another 5 minutes so they set.

LOOK AT ALL THAT SUGAR. I'm not entirely sure how I didn't gain 50 pounds just by staring at these. The brownies ended up being super fudgy and delicious, and you certainly don't need more than a small section to satisfy your sweet tooth craving. The Cadbury filling was really interesting after baking and then cooling because it solidified. It did make it easier to shove in my mouth though. It looked like my coworkers enjoyed them because I brought home an empty pan at the end of the day!

Wednesday, January 25, 2012

Sea Salt Brownies

Let me start out by saying that baking while listening to a playlist I made of fun, upbeat songs makes it 20x more fun. It's probably a good thing nobody was around because I'm sure if someone was here and saw me dancing around while whisking some chocolate, they might think I'm crazy. But in reality, I just was in a really good mood and having fun with it. It's been a good week so far, and the second half of it will be even better. Hooray!

So anyways, with the one night I don't have plans this week, I decided to bake some Sea Salt Brownies! I found a love of sea salt in an ice cream with it and caramel (thank you Mary and Whole Foods), and I've been seeing a few other recipes with it in them on Pinterest. I had no real reason to bake these, I just really wanted to after finding sea salt for like, $2 at Trader Joes. I'll be bringing them to some friends tomorrow (including some who are doing something for a good cause, but that's a later post!), so I won't be having brownies sitting around getting uneaten. Of course, since I am baking these a little late in the night, I won't have a picture of one brownie by itself, but maybe I'll update this post later with a picture of one. You'll at least see the full pan, which is really what everyone wants to see anyways, one big block of brownie!

On a side note, I did make a realization the other day. I barely eat anything I bake. I may have a bite or two, or a slice, or a handful of whatever it is, but very rarely do I have baked goods lying around to eat by myself. I either give them to friends or bring them to work. And then I eat Oreos or Reese's Peanut Butter Cups. It's not that I don't like what I bake, it's just...the reason I bake is not to eat it. I bake because it relaxes me, it's fun to be creative, plus it gets people to like me. I'm serious. I've tricked every one of you who are my friends into liking me because I bake for you. Okay. Maybe I'm kidding. But you know that's one of the things you love about me :).

Moving on to the brownies!! Since most of the time my pictures never look that great because of the lighting in my kitchen, I decided to try using the camera on my phone because it's pretty decent. So let me know your thoughts on the photos and I may keep doing them that way :)

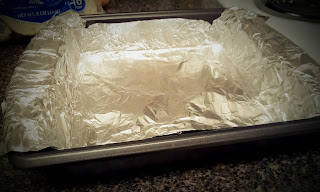
You'll want to start by preheating your oven to 350 degrees, and line a 9x9 pan with foil. You'll also want to butter or spray Baker's Joy on the foil so you can easily get the brownies off of it later.

Then on very low heat, you'll want to heat 1.5 sticks of butter (or 12 tablespoons) with about 2 ounces of semi-sweet or un-sweet chocolate that's been chopped. 2 ounces is equal to about 4 tablespoons. Chopping chocolate can be a little annoying, so I find using chocolate chips is a lot easier since they're already small!


Once this is all melted, you'll take it off the heat and then whisk in the rest of the ingredients one at a time. You don't want to dump everything in at once because it'll be harder to make sure everything is incorporated completely.

So first you'll whisk in 1/4 cup plus 2 tablespoons unsweetened cocoa powder.

And then 2 cups sugar.

And then 3 eggs. I had mine sitting out to get closer to room temperature, so if the chocolate was still a little warm, you wouldn't have to worry about curdling.

And then 1.5 teaspoons vanilla and 1 cup flour.


Once everything is mixed completely, and the batter looks all fudgy and delicious, you'll pour it into the pan, and then sprinkle 1/2 a teaspoon of sea salt on top of the brownies. Yum!


Then you'll bake them for about 35 minutes until a nice comes out clean.


After you take them out of the oven, let them cool for about an hour, and then put them into the fridge so you can cut them up. That's more for if you're eating them right then. Otherwise, you can probably just let them stay at room temperature until you're ready to cut them up and eat them!

I'll post an update later about how they tasted and possibly a picture of one brownie by itself!