Wednesday, December 28, 2011

Chalkboard Message Board

Every year (well, for the past two years), me and two of my best friends get together to have a little Christmas dinner. It's usually a bunch of finger foods and dessert, but it's always a great time. Anyways, I wanted to make them something cute for their Christmas presents! So I decided to make them little chalkboard message boards for their fridges! 

I started by going to Michael's and picking up two unfinished 4x6 wood frames, some paint (pink and red are their favorite colors, and I got off white for the pattern, and of course, chalkboard paint), magnets, ribbon, chalk, and a stencil. When I got home, I cut two pieces of cardboard a little bigger than the openings in the frame, and pulled out my fabritak glue!


I painted the cardboard pieces with the chalkboard paint, doing two coats to make sure it covered well, and waiting an hour between the coats.

Then I also painted the frames, including the edges. You'll want to do two coats on these as well.

Once the frames were dry, I picked out two parts of the stencil, put them on the frame, and then painted a couple coats.

Unfortunately, the paint did bleed under the frame just a little, but it still looks really pretty!


Then, once the paint was completely dry, using my fabritak glue (or super glue, or hot glue, whichever you have), I glued the cardboard to the back of the frame, pushing it down to make sure it held. And then I glued four magnets onto the back!

The part that I struggled with was figuring out how to attach the chalk so that it wouldn't get lost, or always fall down. I ended up cutting some ribbon, gluing it the back of the frame (so that it would wrap across the top and hang) and then double knotted the other end around the chalk!

And now the completed frames! You'll want to make sure the chalkboard paint cures for at least 24 hours and then rub them with the chalk before you actually write on them, so the words don't become permanent on the board. The only issue with using cardboard, is you do get some of that ripple effect, but in general it's super cute!

I also had bought a piece of wood for this project, but then ended up not using it (I won't go into my failed idea, for it), and looking at their chalkboards made me want one too...so I painted the wood, added my own pattern, glued the ribbon and chalk to the back along with some magnets, and ta-da! My own message board!
Yes. It is awesome sauce.

Peppermint White Chocolate Rice Krispie Treats

As Christmas is winding down, I had to make one more holiday flavored dessert! I decided to go with something a little easy, yet incredibly tasty, Peppermint White Chocolate Rice Krispie Treats!

This recipe is for a 8x8 pan, but if you double it, you can make a 9x13 pan for a crowd. But if you do that, it needs to be a big crowd because these things are sweet and you won't want a huge piece!

You'll want to start by crushing some peppermint candies. Make sure you leave a few chunky pieces!

I probably crushed about 20, and I used my meat tenderizer to get the job done!

Then, in a skillet, you'll want to melt about 20 marshmallows and 1.5 tablespoons of butter on low heat.

While these are melting (and you're stirring occasionally to make sure it doesn't burn to the pan), measure out 3 cups of Rice Krispies (or generic brand if you can find one!) into a bowl. Then you'll want to pour half of your crushed peppermint into it. Make sure you get a nice mixture of the powder and pieces in the half you pour in. Doing this step makes it easier to combine everything!

Then once your marshmallows are melted and gooey...

...you'll take it off the heat and pour in the Rice Krispie Peppermint mixture, and make sure it's all combined well. And then you'll pour it into your pre-greased pan.
Now a few tips! If you find your spoon is sticky and you're not able to get everything to stay in the pan, grease a spatula and use that to push everything down. Also, as soon as you pour everything out of your skillet, immediately put it under some water to soak. It'll be far easier to clean when you're done!

Once you have your treats in the pan, you'll want to melt about half a bag of white chocolate chips.

And then you'll spread the white chocolate on top of the treats.

And then pour the rest of the peppermint candies on top of the white chocolate!

Put the treats in the fridge for about 20 minutes so the chocolate sets, and then they're ready to eat!


They're super sweet, but the perfect touch of peppermint and white chocolate flavors! I suggest enjoying it with a nice cup of hot chocolate!

Sunday, December 25, 2011

Christmas Crafting: Fabric Block Puzzle

Awhile ago on Pinterest, I pinned this really cool fabric block puzzle that I thought would be a great present for my nephew and/or niece. So when Christmas came around, I decided to make them!

Here was my inspiration: http://www.craftinessisnotoptional.com/2011/05/fabric-puzzle-blocks-tutorial.html
Hers look amazing, especially compared to mine, but I'm hoping the love I put into making these blocks shines through to them...and if not, I'll just remind myself that they're too young to really notice their gift isn't as pretty as it could be. I'm sure they'll love playing with them either way!

I got sixteen 2x2inch blocks (you can find them at AC Moore, online, or go get them cut at a hardware store like Lowes or Home Depot), and luckily I already had Mod Podge, a sponge brush, ruler, and I borrowed a fabric rotary cutter from one of my friends. I then headed to JoAnn's to pick out my fabric. This was an intense task because I was trying to find patterns that were mostly gender-neutral since I was making one puzzle for both of them, and I was trying to find patterns that weren't too nursery-looking. Those were some of the cutest ones of course, but not what I was looking for! I eventually found six good patterns, and had them cut about a foot off of each fabric, because that gave me some room for error (and I needed it!)


You start by cutting your fabric into an 8x8 inch square using your rotary cutter, a ruler, and a hard surface. Now make sure when you're cutting it up, you make sure to piece the "puzzle" back together so that you know exactly where to put the pieces on the blocks! If you mess this up, you're puzzle will definitely not be square, and definitely might not ever be put together.

Once you have your squares cut, make sure you have your blocks lined up in the square. Then, you just spread a thin layer of Mod Podge onto one side of a block and place the corresponding piece of fabric onto the block.

I highly suggest doing all of these steps for each fabric all together, and then go and do them for the next fabric. This will allow time for the Mod Podge to dry, and also will prevent you from losing pieces of fabric or things getting out of order.

Here are all the sides of my blocks!


There are a few strings, and some pieces hanging over edges, partly because I am terrible with a rotary cutter, and the blocks aren't all perfectly 2x2. But all in all, I think it's a cute present and I'm pretty pleased with it. I hope my niece and nephew have a lot of fun putting together the puzzles!

Saturday, December 24, 2011

Christmas Crafting: Name From Everyday Objects

Every Christmas I struggle to find something to give my parents. They're not much help either; this year my mom asked for a hat and she suggested I get a scraper for my dad. Yea right. Those are boring gifts, especially when you have the itch to be creative!

One thing I've always loved that's out there in the Etsy world are those pictures of names from every day objects. They can range anywhere from $20-150 (seriously people? $150???? I could understand it if it's a super ridiculous long name with a Q or something, but for those of us with easy ones? Not so much). Seeing as how our last name is pretty easy, I figured I could try to do this myself!

Luckily I thought about this a couple weeks before Christmas, so every day on my way to and from work, or if I went out somewhere, I was always looking around, seeing what I could find to satisfy the S, T, three Es, and L that I needed. I also did a little research on the internet to get an idea of what other people had done. 

The S turned out to be the most problematic, but on my way to work one day, I passed by the little playground and noticed the slide, at the right angle, it looked like an S! PERFECT! I was so excited because it was the last letter I had needed. For the T, I used part of my apartment building structure, for the L, I used a curb, and for the Es, I found branches in the right shape, used the stripes for the spaces next to handicap parking, and got a close up photo of a stoplight. 

Because the frame I bought was brown, I decided to make the pictures into a sepia tone. You could easily do them in black and white, or leave the color, it's whatever your preference is. Then, using Picasa, I cropped them down to a 4x2 size so that I could put three letters onto a 4x6 print.

Picasa was really great for this because I was able to use the collage feature to create the 4x6 print I needed. 

So here is the final product!
And in it's frame!

You really start to see letters in things everywhere if you start working on a project like this. If it's something you're considering doing, but need ideas for letters, I can probably help because I definitely was seeing a bunch of letters in things that I didn't need! 

Merry Christmas!

Monday, December 19, 2011

Mini Lemon Pound Cake

While I sent a large group of friends, the Apple Butter Banana Bread the other week, I still had a group of friends I hadn't baked for yet, that I definitely wanted and needed to because they're very important to me. So, I had another mini loaf recipe I wanted to try for Lemon Pound Cakes!

First you combine 2 3/4 cup flour, with 1/4 cup cornstarch (you're basically making cake flour), 2 tsp baking powder, 1/2 tsp salt, and 1/4 tsp nutmeg.

Then you beat 1 cup of softened unsalted butter until smooth. And then add 2 cups of sugar, and beat until nice and fluffy.

You'll then lightly whisk 3 eggs and then add then to the butter sugar mixture.
Once the eggs are well incorporated, you'll add the zest of a whole lemon (I love using my zester!)

And then you'll alternate the dry ingredients with a cup of whipping cream. So you'll do 1/4 dry ingredients, and then 1/3 cream, and you'll end with the last 1/4 of dry ingredients.

Once all of that is mixed well together, you'll blend in 1 tablespoon lemon extract and 1 teaspoon vanilla extract.

Then the batter is ready to bake! Because of the size of my mini loaf pans, I was able to get five loaves from this batch. Just make sure you spray them with Baker's Joy or something similar beforehand so they lift right out after baking!

You'll want to have the rack in the oven in the bottom third of the oven, and then you'll bake the loaves about 45 minutes at 350 degrees.

I haven't tried them, but they smell delicious and just the right amount of lemony!

Sunday, December 18, 2011

Eggnog Cupcakes

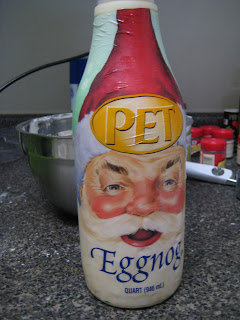
In the continued spirit of the Christmas season, I decided to try a new festive recipe, Eggnog Cupcakes! Eggnog, while very delicious, is so thick, so it's hard to drink too much of it. So the best way to get the flavor of it is to put it in to recipes! I've made Eggnog ice cream before, so when I saw a recipe for Eggnog Cupcakes, I just knew I would be making them this holiday season. 

This recipe makes about 18 cupcakes. If you only want to make a dozen cupcakes, just do 2/3 of each ingredient (yes, sometimes baking means doing math...it's not just a science!)

First, you combine 2 1/4 cups flour, 3/4 tsp baking soda, 3/4 tsp baking powder, 3/8 tsp salt, and 3/4 tsp nutmeg (my apartment ended up smelling like nutmeg the rest of the day...not a bad thing). I used my whisk to make sure the ingredients were mixed well together.

Then you beat 3/4 cup unsalted butter that's been softened to room temperature and 1 1/2 cup sugar until it's light and fluffy, which takes about 3 minutes on medium/high speed.

Then you add in 3 eggs, one at a time, and make sure each is incorporated well before adding in the next one.

Once the eggs are all added in, you'll alternate the dry ingredients with the Eggnog!

You'll use a total of 1 1/2 cups of Eggnog, so you'll do 1/3 the dry ingredients, 1/2 cup eggnog, and then do that two more times. Once everything is combined and the batter is smooth, you spoon the batter into the baking pans with the liners. The best way to do this, in my opinion, is to use an ice cream scoop! It's the perfect size and I don't make much of a mess.


You'll bake the cupcakes for about 20 minutes in a 350 degree oven. I ended up having to bake them a little bit longer, and rotating the pans because the ones in the back of the oven were cooking faster than the ones in the front. So I probably baked them all in all about 25 minutes. Either way, you'll want to check them after 20 minutes, and keep them baking until a toothpick you stick in them comes out clean. 


And now it's time for the frosting!!!

You'll want to beat 3/4 cup unsalted room temperature butter until it's smooth.

Then you'll add in 3 3/4 cup powdered sugar, about 1 cup at a time.
I recommend beating the frosting on medium/high for a couple minutes after each addition to make sure it's smooth and creamy. Then you'll add in 3/16 tsp nutmeg.
And then add in about 6-9 teaspoons of eggnog until it's the consistency you prefer. 
Once the frosting was done, I put it on the cupcakes!

Let me tell you. These things are eggnogy, delicious, sweet, and awesome. You definitely cannot have more than one (unless you reeeeeeeeeeeeeeeeeeally love eggnog), but they are a perfect holiday treat!